Meraki Outdoor AP Deployment For Reliable Network Coverage

Deploying outdoor Wi-Fi isn’t just a matter of sticking an indoor access point on a wall. You’ve got to plan for wind, rain, dust, UV rays, and temperature swings. Cisco Meraki’s MR76, MR86, and MR78 offer IP-rated enclosures, Wi-Fi 6 and 7 performance, and flexible antenna options, allowing you to achieve coverage targets without constant adjustments.
Success starts with tailored site modeling, precise channel design, and solid mounting specs. Once your radios are live, proactive Dashboard checks and alert-driven maintenance keep interference and downtime at bay. Let’s dig into every step, from picking the right AP to mastering daily ops.
Why Outdoor Deployments Need A Different Approach
Outdoor Wi-Fi gear lives in an environment that never lets you take it easy. One minute, UV rays bake housings until plastics fade and crack; the next, salt spray or rain drives moisture into seams designed for comfort, not storms. Electronics inside must shrug off freeze-thaw cycles that can warp boards and disrupt solder joints, all while debris, dust, and airborne particles threaten to clog vents and antennas.
Meanwhile, RF behavior outside is a moving target. Trees sway, vehicles arrive and depart, and nearby structures cast new reflections every hour, creating shadow zones and hotspots that shift with the weather and time of day. Purpose-built enclosures, industrial-grade temperature ratings, and detailed site surveys make the difference between a network that survives its first season and one that keeps users connected year after year.
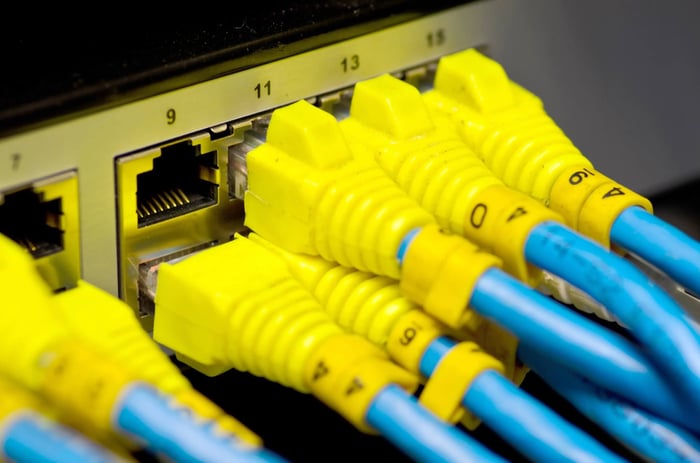
Choosing The Right Meraki Outdoor AP For Your Site
Matching hardware to real-world needs prevents wasted installs and surprise truck rolls. Whether you’re covering a sprawling campus or a compact courtyard, each Meraki model brings unique antenna setups, power draws, and throughput ceilings. Picking the right AP up front means you’ll meet coverage, capacity, and budget targets on day one, no repeat orders required.
Model | Antennas | PoE Requirement | Ideal For |
MR76 | External | 802.3at (PoE+) | General-purpose outdoor use — flexible mount options |
MR86 | External | 802.3at (PoE+) | High-density areas, dual port support, extra power draw |
MR78 | Internal | 802.3af (PoE) | Budget installs, simpler mounting, lower user count |
CW9163E | External | 802.3at (PoE+) | Outdoor Wi-Fi 6E deployments, tri-band coverage, flexible external antenna configurations |
CW9179F | Internal (high-gain) | 802.3bt (UPoE) | Large public venues, high-density outdoor areas, early Wi-Fi 7 adoption, advanced scanning + IoT support |
Pre-Deployment Planning And Mapping For Maximum Impact
Every minute spent modeling and measuring cuts hours off troubleshooting later. Running predictive heat maps on your actual site layout reveals shadow zones before you buy gear. A ground walk uncovers obstructions that software can’t see.
Combine those insights with precise cable-run measurements and PoE budgeting, and each AP arrives plug-and-play, saving time, money, and headaches.
Predictive Heat Mapping for Outdoor Coverage: Use satellite imagery or CAD drawings to simulate RF propagation, identify dead zones, and optimize AP count and antenna orientation before ordering equipment.
Ground Walk for RF Obstacles: Conduct a site survey with a spectrum analyzer and logging tool to record multipath reflections, signal shadows, and interference sources that software models might miss.
AP Placement and Spacing: Translate modeling data into a placement plan with 30–50 m spacing and ~20 % overlap, ensuring consistent coverage while avoiding co-channel interference across all frequency bands.
Cable Path Measurement and Assessment: Measure actual conduit or tray lengths, note bends, elevation changes, and sealing requirements to prevent voltage drop and maintain PoE reliability over the entire run.
PoE Budget Calculation: Aggregate each AP’s maximum power draw—including any surge allowances—against your switch or injector capacity, confirming you have sufficient wattage headroom for peak scenarios.
Power Source Verification and Backup: Verify UPS or solar backup capacity for outdoor enclosures so critical APs stay online during grid failures or maintenance windows without service interruption.
Switch Port Mapping and VLAN Assignments: Pre-label rack ports and assign guest, corporate, and IoT VLAN tags in your network diagram so installers plug each AP into the correct segment day one.
Tip: Incorporate real-world ground-walk findings back into your heat-map model to refine AP counts before purchasing.
Mounting Specifications
A mount that survives wind, ice, and vandalism makes your “set-and-forget” promise real. Choosing the right bracket material, sealing every joint, and bonding to ground aren’t optional; they’re essential.
Proper height and antenna tilt lock in your coverage footprint, while surge arrestors and marine-grade fasteners survive against lightning and corrosion.
Bracket Types: Select stainless steel for corrosive or UV-intense climates, or UV-stable polymer where metal might rust.
Height Range: Position APs 3–5m high to maximize client reach while deterring tampering.
Antenna Tilt: Down-tilt external antennas 3–5° to concentrate coverage on the user plane and reduce overshoot.
Bonding and Grounding: Tie brackets, masts, and enclosures into your building’s grounding bar to bleed off static and lightning currents.
Lightning Arrestors: Place surge suppressors on both Ethernet and RF lines at entry points to protect radios from voltage spikes.
Fasteners and Sealants: Use stainless screws with silicone gaskets to lock out moisture and prevent corrosion.
Clearance Guidelines: Maintain at least 1m clearance from walls, HVAC, or other metallic obstructions that could reflect or block RF.
Spacing And Channel Design
Outdoor spectrum is precious, too little spacing invites interference, too much leaves dead spots. By tailoring spacing to each band’s propagation and rotating channels in a reuse grid, you maximize throughput and minimize noise. Guard bands around high-power nodes and device-density planning for peak crowds maintain steady performance, even under load.
2.4 GHz Spacing: Deploy 20 MHz channels (1/6/11) with 30–40m between APs to limit overlap and reduce co-channel contention in dense areas.
5 GHz Spacing: Employ 40–80 MHz channels in UNII bands with 40–50m separation, adjusting distances for obstacles like walls or foliage.
6 GHz Spacing: Leverage 80–160 MHz channels where regulations allow; plan tighter 25–35 m hops due to the band’s reduced range and higher path loss.
Channel Reuse Patterns: Implement a reuse grid—alternating channels across adjacent APs—to prevent the same channel appearing on neighboring radios.
Co-Channel Interference Avoidance: Fine-tune transmit power and antenna patterns so overlapping APs on the same channel remain below the carrier-sense threshold.
Guard Band Recommendations: Reserve at least one unused channel gap around high-power outdoor nodes to shield weaker radios from adjacent transmissions.
Device Density Planning: Estimate peak client counts per zone—busy plazas at lunchtime may need double the APs required by a quiet evening park.
Tip: Review channel performance quarterly to adjust reuse patterns based on changing interference sources.
Mesh Configuration Rules (If Used)
When trenching isn’t feasible, mesh can plug coverage gaps—but each hop chips away at throughput. Treat mesh as a last resort. Keep hop counts to two, enforce a strong RSSI floor, and isolate backhaul traffic on its own SSID and channel. Monitor each link in the Dashboard so you catch weakening mesh neighbors before users feel it.
Wired Backhaul Preference: Always feed high-traffic APs with Ethernet; reserve mesh for fringe coverage.
Hop Count Limits: Cap hops at two to avoid halving bandwidth at each relay.
RSSI Threshold Settings: Enforce ≥ –65 dBm on backhaul links for reliable mesh stability.
Mesh SSID Configuration: Assign mesh traffic its own SSID and VLAN to separate it from client data.
Mesh Channel Assignment: Use distinct channels for mesh and client radios to prevent self-interference.
Per-Hop Throughput Considerations: Plan each hop’s available bandwidth by accounting for halved throughput.
Monitoring Mesh Performance: Track link quality and hop counts in the Dashboard’s Mesh Neighbors view daily.
Meraki Dashboard Practices For Ongoing Outdoor AP Maintenance
Spend minutes each day on these tasks to keep small glitches from turning into major outages:
Claiming Devices
Add each AP’s serial to the correct organization and network before powering up—enabling zero-touch provisioning and ensuring devices auto-pull the right configuration on first boot.
Keeping your inventory synchronized prevents misassigned devices and speeds recovery when hardware swaps are needed.
Tagging And Grouping APs
Apply descriptive tags by site, building, or user group so you can push configuration updates to a subset of APs in one click. Grouping simplifies large-scale changes and helps filter analytics, accelerating troubleshooting without manual per-device tweaks.
Applying RF Profile Templates
Create and assign RF profiles to tagged groups to enforce consistent power limits, channel masks, and DFS settings across all outdoor deployments. Templates standardize network behavior, cut template drift, and reduce human error during manual radio configuration.
Enabling Band Steering And Client Balancing
Activate band steering to coax capable clients onto cleaner 5 GHz or 6 GHz bands, and turn on client balancing to distribute associations evenly. These features improve overall throughput by preventing overcrowding on any single radio or band.
Monitoring With Live Tools And Analytics
Leverage the Dashboard’s Floor Plan heat-map overlays to visualize coverage gaps, use real-time Spectrum Analysis to spot interference sources, and run Packet Capture on demand. These tools help you diagnose and resolve issues before end users are affected.
Scheduling Firmware Updates
Set up maintenance windows during off-peak hours for automatic firmware upgrades. Scheduled updates keep your APs on the latest security patches and feature releases without unexpected reboots during critical business periods.
Configuring Alerts And Reports
Define alert thresholds for high retry rates, interference spikes, channel changes, and device-offline events. Route notifications via email, SMS, or webhook to your NOC or support team, ensuring you’re the first to know when network metrics drift out of spec.
Why Choose Hummingbird Networks For Your Deployment
You deserve more than a parts supplier—you need a partner who moves as fast as you do. Hummingbird Networks delivers Meraki hardware in days, not weeks, and assigns you a named rep who manages BOMs, licensing, and pre-install design reviews. As an authorized partner, we tap directly into Cisco’s resources for replacements, firmware insights, and expert troubleshooting, so you stay focused on operations, not vendor juggling.
Power Reliable Outdoor Connectivity With The Right Access Point
Outdoor Wi-Fi doesn’t have to be a gamble when you combine the right Meraki hardware with data-driven planning and white-glove support. By choosing the MR76, MR86, or MR78-based on site-specific heat maps, environmental challenges, and client density, you ensure optimal coverage and capacity from day one. Our certified engineers validate every mounting detail and RF configuration before deployment, then leverage the Meraki Dashboard to keep you ahead of interference and performance shifts.
Partnering with Hummingbird Networks means you gain a dedicated expert who manages licensing, BOMs, and configuration templates, plus priority access to Cisco resources for rapid replacements and firmware insights. We’re not just selling gear; we’re delivering a turnkey service that locks in reliability, simplifies ongoing maintenance, and gives you back the time to focus on your core business.
Ready to upgrade your outdoor Wi-Fi? Connect with the Meraki experts at Hummingbird Networks and get the perfect solution for your space.
FAQs
1. How do environmental RF variables like foliage growth and seasonal changes affect Meraki outdoor AP performance?
Trees absorb and scatter RF differently throughout the year. In spring and summer, leaf density increases attenuation by several dB, especially at 5 GHz and 6 GHz. Coverage that looks clean in winter can degrade once foliage thickens. Many teams run seasonal validation surveys and adjust antenna tilt or transmit power to keep SNR above their target threshold.
2. What’s the best way to harden outdoor Meraki APs against physical tampering and theft?
Outdoor APs are magnets for curious hands. Locking brackets, tamper-resistant fasteners, and concealed cable entry points keep devices secure. Some teams place APs on poles or raised conduits that sit outside casual reach. In Meraki Dashboard, enabling device-removed alerts ensures you’re notified the second an AP goes offline unexpectedly.
3. How should you handle DFS (Dynamic Frequency Selection) channels in outdoor deployments?
DFS channels give you valuable spectrum, but they’re prone to radar interference—common around airports, coastal areas, and weather stations. Outdoor APs detect radar at higher sensitivity, so fallback events happen more often. If the site is near known radar sources, many engineers restrict DFS in RF profiles and rely on non-DFS channels to maintain stable performance.
4. What grounding and surge protection practices apply when outdoor APs connect to fiber instead of copper?
Fiber runs help you avoid copper-based surge issues, but the AP still needs proper chassis grounding. The enclosure, mount, and lightning arrestor should bond to the same grounding bar, even if data arrives via fiber. If a PoE media converter sits near the AP, that device also needs surge protection on its power input to prevent latent failures during storms.
5. How do you validate that outdoor mesh links will stay stable during peak usage or bad weather?
RSSI and SNR values taken on a sunny day rarely tell the full story. Mesh links need headroom. Many engineers design to a higher minimum RSSI than–65 dBm, and they stress-test backhaul by simulating peak client loads while monitoring retransmissions and PHY rates. Weather swings, especially humidity and rain, can temporarily degrade propagation, so extra margin pays off long term.
6. What security controls should you add when outdoor APs serve both public and corporate traffic?
Public-access zones require tighter segmentation. Isolate guest traffic on its own VLAN, enforce DHCP guard and spoof protection on upstream switches, and apply Meraki firewall rules to cut lateral movement. When APs sit near parking lots or sidewalks, rate limiting prevents IoT scrapers or malicious clients from soaking bandwidth.
7. What’s the recommended maintenance schedule for outdoor AP enclosures and antenna hardware?
Even with IP-rated housings, outdoor equipment takes a beating. A quarterly inspection catches cracked gaskets, rusting fasteners, or insect ingress before failure occurs. Many teams clean external antennas annually to remove dust or mineral buildup that slightly detunes RF patterns. These checks pair well with Dashboard analytics reviews to confirm airtime and retry metrics haven’t drifted.
8. How do you handle future-proofing when Wi-Fi 7 and 6 GHz adoption increases across outdoor spaces?
Outdoor 6 GHz coverage is still maturing, especially with changing local regulations. Designing with modular or external-antenna APs gives you room to adapt as rules shift. When planning conduit and mounting points, leave extra slack and clearance so you can add directional antennas or upgrade to the next-gen Meraki hardware without re-running cable or repositioning poles.